The Labels report is a powerful tool to help you manage your deliveries. The generator contains a number of useful fields to help meet a variety of your needs. This week, I will share some tips on how to create color-coded labels and create a customized look for your labels. To learn more about the different settings for the Labels report, visit our Help Site.
Color coding by location
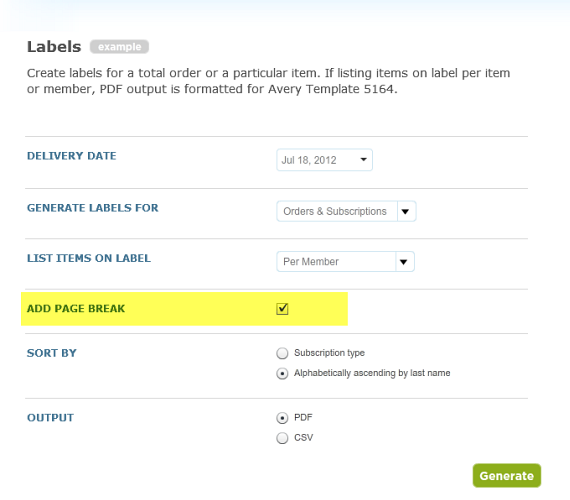
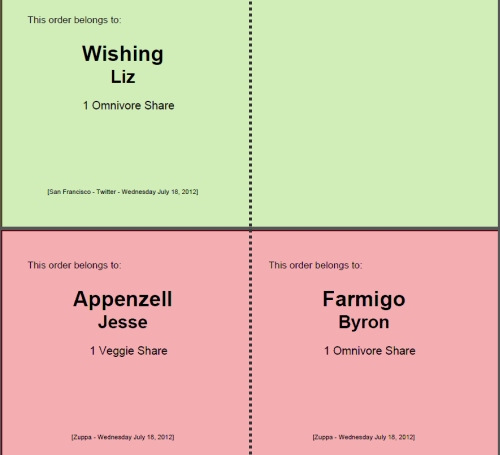
When you check the box to "ADD A PAGE BREAK" to your Labels report, the resulting PDF file will insert a page break between labels sorted by location. Then you can print out labels for each location with a different colored label.
 |  |
Starting from scratch
When you generate the Labels report as a CSV file (OUTPUT = CSV), you will have a database that is organized into helpful columns. You may then use this database in conjunction with a word processor to create your own labels template. Below I've outlined steps that you may take to set up such a template using Microsoft Word 2007/2010. For a more general understanding of this functionality, check out Microsoft Office's online tutorial to build a Mail Merge.
How to create a labels template in Microsoft Word 2007 or 2010
To create a template use each week with your Farmigo Labels report, follow these steps:
- Go to the Labels report generator, select a delivery date, and then configure the other fields to meet your specifications. Set OUTPUT to CSV. Generate the report and save it in a memorable location on your computer.
- Open Microsoft Word 2007/2010 and go to the Mailings tab. From the Start Mail Merge area, click the Start Mail Merge button and select Labels from the menu.
- When the Label Options dialog box appears, select the relevant Label vendor and Product number; then click OK.
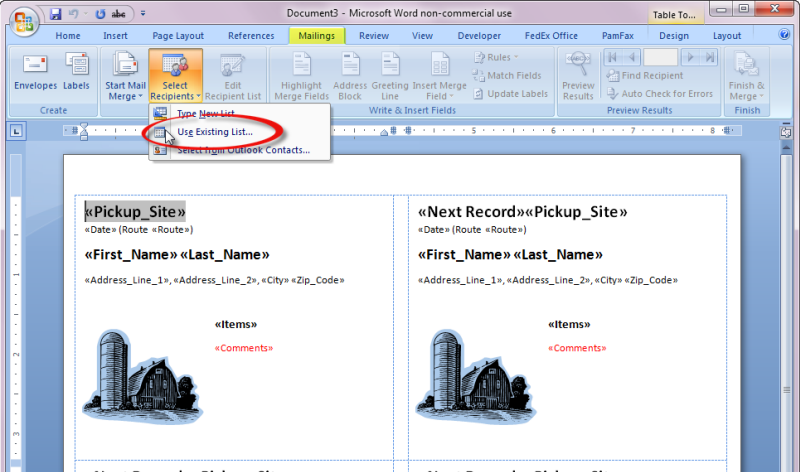
- From the Start Mail Merge area, click the Select Recipients button and select Use Existing List from the menu. Find and open the CSV Labels report that you just generated from your Farmigo Dashboard.
- In the first cell of the Labels table, use the Insert Merge Fields button from the Write & Insert Fields area of the Mailings tab to set up your template. You may also change the look and placement of the text and insert an image.
- Once you have set up your template in the first cell of the Labels table, click the Update Labels button from the Write & Insert Fields area of the Mailings tab. This will copy the template to all cells in the table. (Click Preview Results to see what your labels would look like with the data filled in.)
- Go to the Main menu of Word and save this document as a Word Template in memorable place on your computer.
Watch how to create a template in 5 minutes ...
How to use your new Labels template
Now that you have created your template, let's use it!
1. Go to the Labels report generator in the Farmigo Dashboard, select the relevant delivery date, and then configure the other fields as you did when you were creating your template. Set OUTPUT to CSV. Generate the report and save it in a memorable location on your computer.
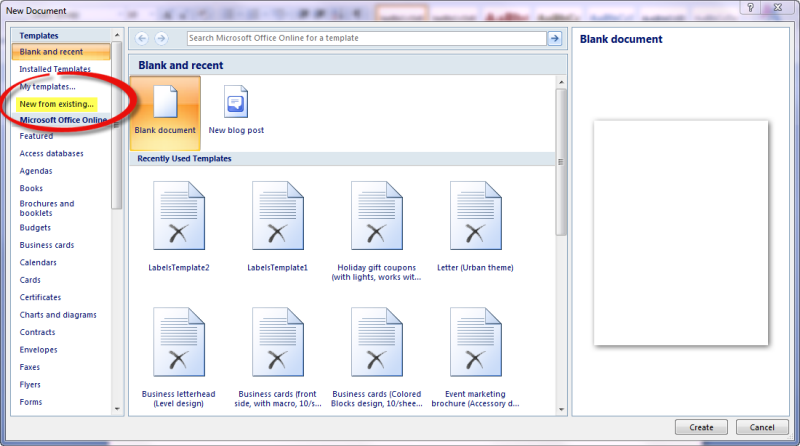
2. Open Microsoft Word 2007/2010 and select new from the main menu in the upper left-hand corner. When the New Document dialog box appears, select "New from existing ..." on the left. Find the template that you created and click Create New.
1. Go to the Labels report generator in the Farmigo Dashboard, select the relevant delivery date, and then configure the other fields as you did when you were creating your template. Set OUTPUT to CSV. Generate the report and save it in a memorable location on your computer.
2. Open Microsoft Word 2007/2010 and select new from the main menu in the upper left-hand corner. When the New Document dialog box appears, select "New from existing ..." on the left. Find the template that you created and click Create New.
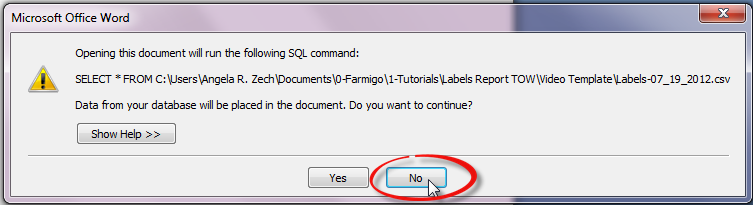
* An Error Message may appear that starts with "Opening this document will run the SQL command: ...". Click No here.
3. Now that you have created a new document based on your labels template, go to the Mailings tab. From the Start Mail Merge area, click the Select Recipients button and select Use Existing List from the menu. Find and open the CSV Labels report that you just generated from your Farmigo Dashboard.
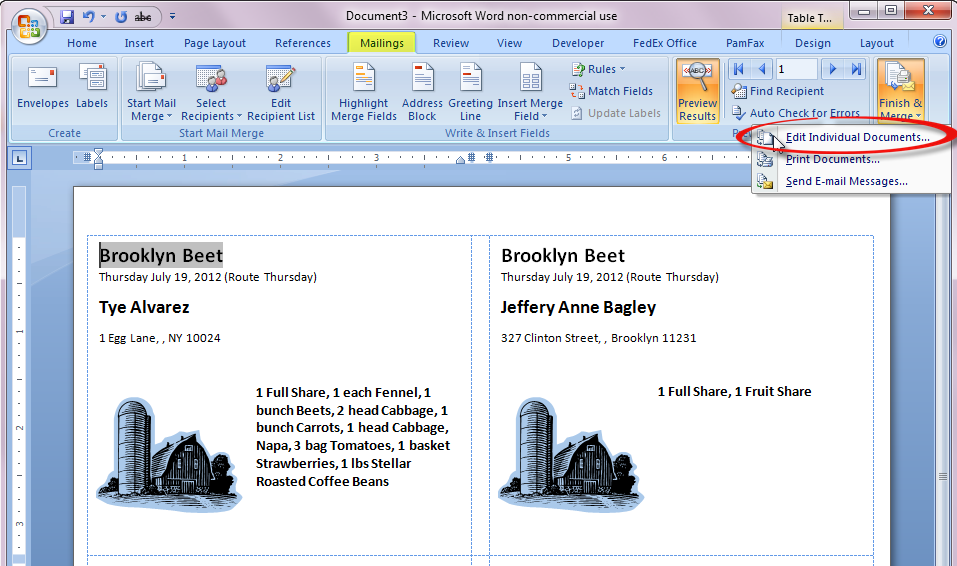
4. Then click the Finish & Merge button and select Edit Individual Documents from the menu. Choose the option to merge All records and click OK. This action will merge the data from your CSV Labels report with the Labels template. Now you may review the merge and print your labels.
How does the Labels report help you?
Add a comment here and share your helpful ideas for using the Labels report :)