Farmigo Support
  • HOME
  • Browse Help & Support
  • Farmigo Mobile
  • Tip of the Week
  • Why Farmigo?
  • Contact Support

Email Feature Enhancements

7/27/2012

 
As Farmigo continues to grow, we are helping more and more CSAs and programs to communicate with their members.  To handle the increasing traffic on the Farmigo servers, we have taken several steps to improve the system and prevent emails from being marked as spam.  This week we implemented a new system for managing email traffic that provides your program with your own virtual email address.

How does the virtual email address work?

When an email is sent to a member via your Farmigo Dashboard, the “From” field is automatically populated with an email address that is associated with the Farmigo server.  The email is then sent from your Dashboard through the Farmigo server and into the member’s inbox.  
Picture
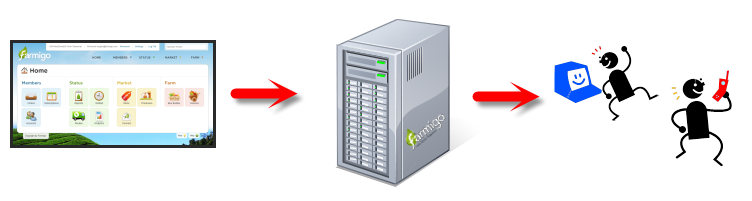
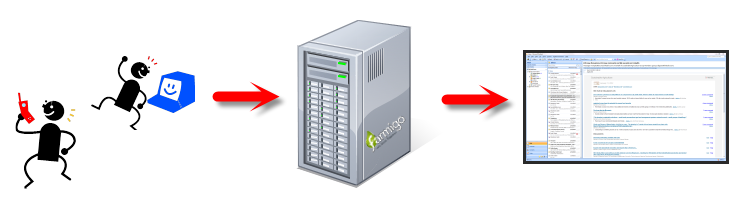
When the member replies to this virtual email address, the reply is sent via the Farmigo server and into your program’s inbox.
Picture

What your members will see

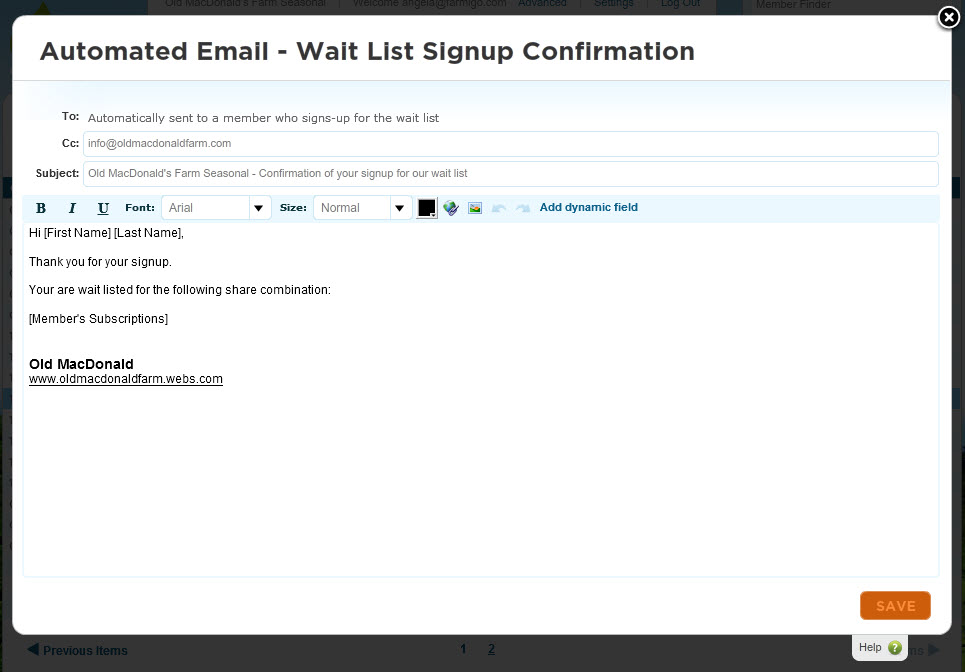
Previously, when a member received an email from you sent via the Farmigo Dashboard, the From field showed your program’s name and “[email protected]” as the sender.

Now, emails will no longer be sent via “[email protected]”.  Instead your member will see an email address that uniquely identifies you in the Farmigo email servers.  This email address follows this template: 

farmigo.[your Farmigo URL]@farmigo-csa-hr.appspot.com

For example, if this is the link to my Dashboard:

http://csa.farmigo.com/dashboard/oldmacdonaldfarm

This is now my virtual Farmigo email address:

farmigo.oldmacdonaldfarm@farmigo-csa-hr.appspot.com 


We encourage you to ask your members to add your virtual Farmigo email address to their list of safe senders.

Creating Unique Labels

7/19/2012

 
The Labels report is a powerful tool to help you manage your deliveries.  The generator contains a number of useful fields to help meet a variety of your needs.  This week, I will share some tips on how to create color-coded labels and create a customized look for your labels.  To learn more about the different settings for the Labels report, visit our Help Site.

Color coding by location

When you check the box to "ADD A PAGE BREAK" to your Labels report, the resulting PDF file will insert a page break between labels sorted by location.  Then you can print out labels for each location with a different colored label.
Picture
Picture

Starting from scratch

When you generate the Labels report as a CSV file (OUTPUT = CSV), you will have a database that is organized into helpful columns.  You may then use this database in conjunction with a word processor to create your own labels template.  Below I've outlined steps that you may take to set up such a template using Microsoft Word 2007/2010.  For a more general understanding of this functionality, check out Microsoft Office's online tutorial to build a Mail Merge. 

How to create a labels template in Microsoft Word 2007 or 2010

To create a template use each week with your Farmigo Labels report, follow these steps:
  1. Go to the Labels report generator, select a delivery date, and then configure the other fields to meet your specifications.  Set OUTPUT to CSV.  Generate the report and save it in a memorable location on your computer.
  2. Open Microsoft Word 2007/2010 and go to the Mailings tab. From the Start Mail Merge area, click the Start Mail Merge button and select Labels from the menu.
  3. When the Label Options dialog box appears, select the relevant Label vendor and Product number; then click OK.
  4. From the Start Mail Merge area, click the Select Recipients button and select Use Existing List from the menu.  Find and open the CSV Labels report that you just generated from your Farmigo Dashboard.
  5. In the first cell of the Labels table, use the Insert Merge Fields button from the Write & Insert Fields area of the Mailings tab to set up your template.  You may also change the look and placement of the text and insert an image.
  6. Once you have set up your template in the first cell of the Labels table, click the Update Labels button from the Write & Insert Fields area of the Mailings tab.  This will copy the template to all cells in the table.  (Click Preview Results to see what your labels would look like with the data filled in.)
  7. Go to the Main menu of Word and save this document as a Word Template in memorable place on your computer.
Now you have a template that you can use for every delivery!

Watch how to create a template in 5 minutes ...

How to use your new Labels template

Now that you have created your template, let's use it!  

1.  Go to the Labels report generator in the Farmigo Dashboard, select the relevant delivery date, and then configure the other fields as you did when you were creating your template.  Set OUTPUT to CSV.  Generate the report and save it in a memorable location on your computer.

2.  Open Microsoft Word 2007/2010 and select new from the main menu in the upper left-hand corner.  When the New Document dialog box appears, select "New from existing ..."  on the left.  Find the template that you created and click Create New.
Picture
* An Error Message may appear that starts with "Opening this document will run the SQL command: ...".  Click No here.
Picture
3.  Now that you have created a new document based on your labels template, go to the Mailings tab. From the Start Mail Merge area, click the Select Recipients button and select Use Existing List from the menu.  Find and open the CSV Labels report that you just generated from your Farmigo Dashboard.
Picture
4.  Then click the Finish & Merge button and select Edit Individual Documents from the menu.  Choose the option to merge All records and click OK.  This action will merge the data from your CSV Labels report with the Labels template.  Now you may review the merge and print your labels.
Picture

How does the Labels report help you?

Add a comment here and share your helpful ideas for using the Labels report :)

Methods for Accepting Payment in the Web Store

7/12/2012

 
Upselling is a concept that has been used in restaurants for decades. You order chips and salsa at the Mexican place down the road and they say, "would you like guac with that?" and lo and behold you get your bill and you have $8 worth of guacamole added on. Can't complain though, I love guacamole, so it's a win-win. 

By bringing the CSA model online,  you now have the capability to upsell. "Would you like an extra lb of tomatoes with your veggie share?"   Being able to sell add-ons to a member's existing share helps increase sales while keeping Italian grandmothers happy that they can cook and can enough pasta sauce to feed their family for the entire year. This week's tip discusses three options for accepting payments in the web store.

PLEASE NOTE:  A store can either be set up as Balance, On Checkout, or On Delivery. These 3 payment methods cannot be used in conjunction with each other.  
Check or Cash are not accepted in the web store. Members can only choose from E-check, credit card, and paypal.

Picture
Balance - “put it on my tab”

The member puts money on account with the farm and all web store purchases are deducted from the member's balance. This reminds me of when I went to the pool in the summertime and my parents put money on account at the snack bar. Every time I ordered a new laffy taffy, my total would be deducted from my tab. I was friends with the snack bar staff, so when my account dropped below $0, I was able to continue ordering as much candy as my heart desired. My parents were responsible for paying the balance at the end of the season. If they wanted to, they could choose to walk away and never show their face at the community pool again, but, they needed some way to tire me out, so they always paid.

We recommend using the on balance method along with an automatic renewal payment method that will refill a customer’s account once their balance drops to $0. If you do not have a pre-approve limit set up in your system that will automatically charge members once their balance falls below a certain level, you must monitor member's accounts and choose to continue delivering to them or put them on hold until they add money to their account.

One of the benefits of the on balance method is that you can reward customers for putting money on account which gets you more money up front and ensures that the customer will spend a certain amount with you throughout the season. We can set up pre-payment plans that give customers bonus credit that can used to purchase items in the store. For example, you can ask customers to put $250 on account with you and give them a $20 bonus. 


These are the payment plans found on the make payment screen in the member account view:

Picture
We find that offering a few different pre-payment plans is most effective. For example:
Picture
Picture
At Checkout - the amazon model

When a farm sets their store up for members to pay at checkout, the member is prompted for his payment information at checkout and a charge is initiated at that time. This is similar to using amazon.com where you pay for your items at checkout in order to receive them. This is what most people are used to when shopping online so it provides an ease of use for your customers. The best part is that you never have to worry about balances and members do not need to add money to their account in order to purchase something. 

Here is what paying at checkout looks like:

Picture
Picture
On Delivery - the rental car model
The payment on delivery model is similar to paying for a rental car. You give the company your credit information, take the car, and when you return, you pay for the number of miles you traveled, your gasoline, and any damage done to the car. The rental company doesn't charge you until they know how much they need to charge you.

Setting up the store payment method for on delivery is very similar to this and is particularly useful when selling a product by weight.  If a rancher for example sells ground beef priced at $6.00/lb., and the final weight comes in at 1.05 lbs., the total cost is actually $6.30.  In this case, the admin can change the quantity from 1 to 1.05 in the member's account from the Dashboard, the system will recalculate the total cost, and the member will be charged the correct amount after delivery.

When a farm sets their store up for members to pay on delivery, the system determines if the member has payment information on file.  If they do not, they are prompted for payment information and are charged the morning after delivery. 


Here is what paying on delivery will look like:

Picture
Another tip:
Farmigo can allow non shareholders to access your web store and purchase items as needed (not recommended for systems set up with on balance). We can also set a minimum purchase amount.  Remember, however, that this minimum will apply to shareholders as well as non-shareholders. If you allow guest access, non members with access to your store link will go through the following process:

Opening up the store to non-shareholders may be a good way to pre-sell items to ensure that your time spent at market is time well spent. If you are considering allowing guest access to your web store, contact [email protected] so we can discuss how to set it up and how it will work in your system.

Starting a Waitlist for All Shares

7/3/2012

 
Farmigo can help you to manage multiple waitlists for locations and for shares.  Today's tip focuses on how you may start a waitlist when you believe that you have sold out of all your shares for the time being.

PLEASE NOTE:  If you want to allow members to continue to add options after they have signed up, you do NOT want to waitlist all of your shares.

Setting up the Waitlist

STEP 1:  Go to the Items manager, found under the Market menu in your Dashboard.  Unpublish any Options that have been set up.
Picture


STEP 2:  Open up the Item Editor for each of your Shares and set the number of available units to zero. Save changes.
Picture
STEP 3:  Go to the Connect manager, found under the Market menu in your Dashboard.  Review the information in the "Automated Email - Waitlist Signup Confirmation" and save changes. 
Picture

What Your Members See

Now when a person visits your signup page (the join link), they will only asked to select their preferred share and share their contact information.  They will not be asked for payment at this time.
Picture

How to Move Members Off the Waitlist

When you are confident that you have a enough shares to move some members of the waitlist, you may take the followings steps:

STEP 1:  Go to the Items manager, found under the Market menu in the Dashboard.  Open the Item Editor for the relevant share and increase the number of available units.

STEP 2:  Go to the Waitlist manager, found under the Status menu in the Dashboard.  Use the Item filter to find the members that are waiting on a particular share.  Email each member in the list and ask them if they would like to be removed from the waitlist and what their preferred pickup location would be.  When the member replies, go on to step 3.


STEP 3:  Open the Member Card for a member that you would like to remove from the waitlist.  Under the Subscription tab, add their desired pickup location and their desired share. Remove the waitlisted share. Save changes.
Picture
STEP 4:  Send the new member an email, which includes their pickup location, next date of delivery and a link to make a payment. (To set up an email template, go to the Connect manager under the Market menu.)

For More Information

To learn more about how the waitlist works in other situations, please visit our Help Site to learn more.

    Subscribe to the tip of the week mailing list

    Categories

    All
    Accounting & Finances
    Communicating With Members
    Dashboard Management
    Images & Photos
    Knowing Support
    Managing Deliveries
    Managing Locations
    Managing Payments
    Managing Sign Ups
    Member's Perspective
    Reports
    System Updates And New Features
    Web Store

    Archives

    March 2014
    February 2014
    January 2014
    December 2013
    November 2013
    October 2013
    September 2013
    August 2013
    July 2013
    June 2013
    May 2013
    April 2013
    March 2013
    February 2013
    January 2013
    December 2012
    November 2012
    October 2012
    September 2012
    August 2012
    July 2012
    June 2012
    May 2012
    April 2012
    March 2012
    February 2012