In the most recent software update, we have connected the order in which items are listed in the Box Builder to match the order in which those items are listed in the Packing report.
Read on to learn more.
Read on to learn more.
|
|
In the most recent software update, we have connected the order in which items are listed in the Box Builder to match the order in which those items are listed in the Packing report.
Read on to learn more.
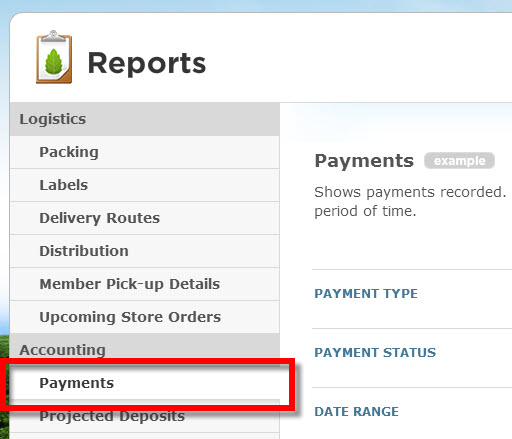
Check out the new Payments report generator by going to the Reports manager, found under the Status menu in your administrative dashboard. Read more below to learn about this new report.
This week Farmigo will be releasing an system update that will add some Oomph! to your Logistics reports.
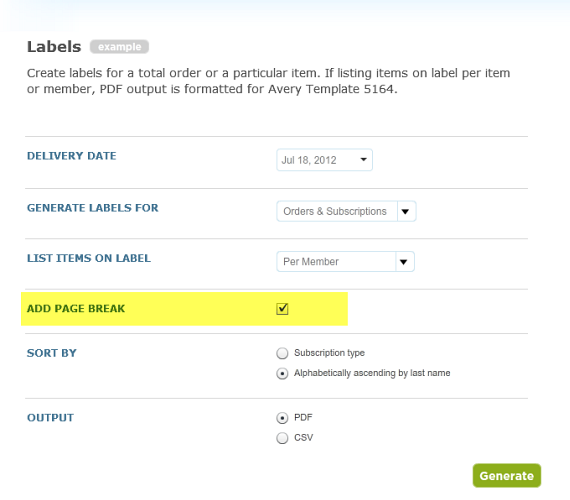
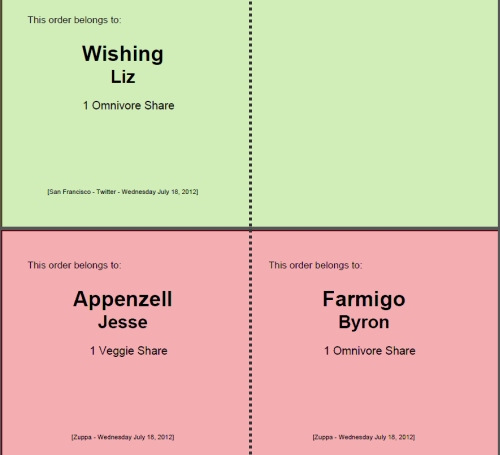
PLEASE NOTE: You will no longer be able to generate the Member Pick-up Details report for past delivery dates! The Labels report is a powerful tool to help you manage your deliveries. The generator contains a number of useful fields to help meet a variety of your needs. This week, I will share some tips on how to create color-coded labels and create a customized look for your labels. To learn more about the different settings for the Labels report, visit our Help Site. Color coding by locationWhen you check the box to "ADD A PAGE BREAK" to your Labels report, the resulting PDF file will insert a page break between labels sorted by location. Then you can print out labels for each location with a different colored label.
Starting from scratchWhen you generate the Labels report as a CSV file (OUTPUT = CSV), you will have a database that is organized into helpful columns. You may then use this database in conjunction with a word processor to create your own labels template. Below I've outlined steps that you may take to set up such a template using Microsoft Word 2007/2010. For a more general understanding of this functionality, check out Microsoft Office's online tutorial to build a Mail Merge. How to create a labels template in Microsoft Word 2007 or 2010To create a template use each week with your Farmigo Labels report, follow these steps:
Watch how to create a template in 5 minutes ...How to use your new Labels templateNow that you have created your template, let's use it! 1. Go to the Labels report generator in the Farmigo Dashboard, select the relevant delivery date, and then configure the other fields as you did when you were creating your template. Set OUTPUT to CSV. Generate the report and save it in a memorable location on your computer. 2. Open Microsoft Word 2007/2010 and select new from the main menu in the upper left-hand corner. When the New Document dialog box appears, select "New from existing ..." on the left. Find the template that you created and click Create New. 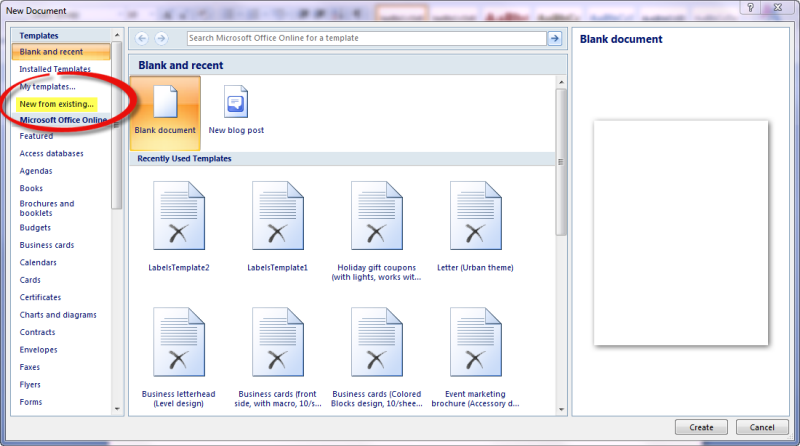 * An Error Message may appear that starts with "Opening this document will run the SQL command: ...". Click No here. 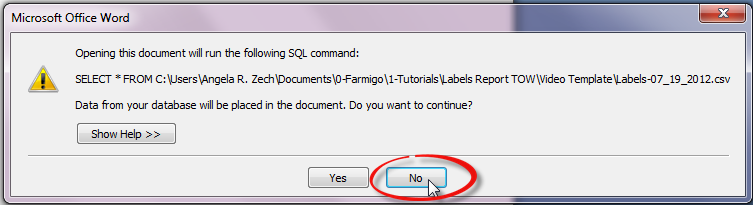 3. Now that you have created a new document based on your labels template, go to the Mailings tab. From the Start Mail Merge area, click the Select Recipients button and select Use Existing List from the menu. Find and open the CSV Labels report that you just generated from your Farmigo Dashboard. 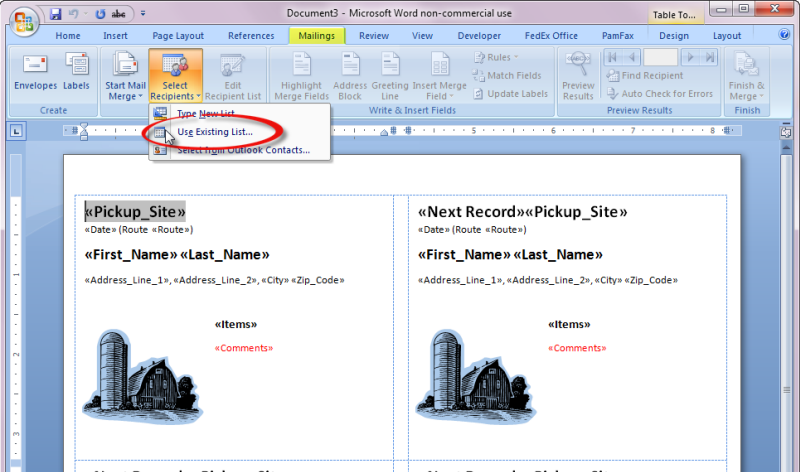 4. Then click the Finish & Merge button and select Edit Individual Documents from the menu. Choose the option to merge All records and click OK. This action will merge the data from your CSV Labels report with the Labels template. Now you may review the merge and print your labels. 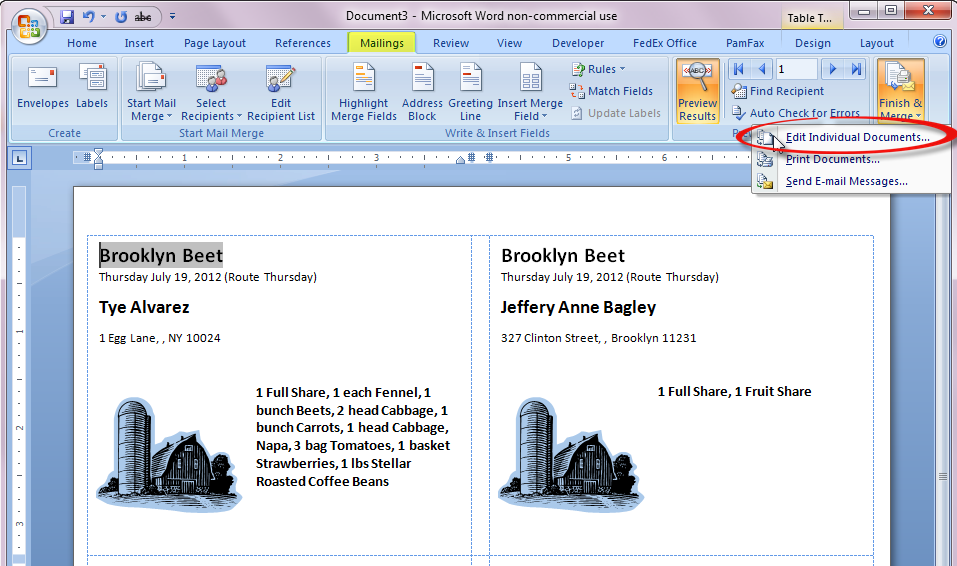 How does the Labels report help you?Add a comment here and share your helpful ideas for using the Labels report :)
One of the fundamental principles that a member agrees to when joining a CSA is that they are most likely paying in advance for their food. Based on the principles of accrual accounting, the cash that you receive before you deliver your goods is considered unearned revenue. Once you deliver your produce to your members, the value of that delivery is then recognized as earned or realized revenue.  The Past Deliveries ($) report provides you with a monthly breakdown of earned revenue by Members, Producers, Locations and Items. To learn more about the Past Deliveries ($) report, click here. How does Farmigo charge for its services? 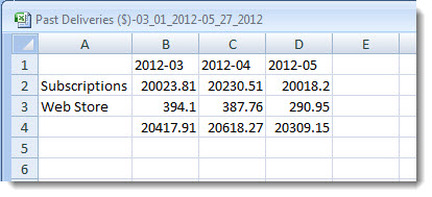 Farmigo calculates its monthly service fee based on total earned revenue between the first and last day of the previous month. This calculation includes subscriptions and web store orders. We will send you an invoice for the past months deliveries between the 5th and 10th of the current month. You will have one week to review your invoice before you are charged. Where do members spend money? 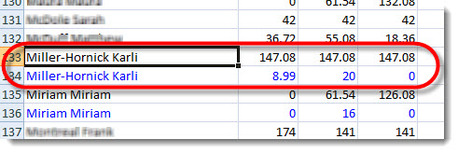 When you breakdown the report by Members, you will see how much revenue has been earned from a member's subscriptions versus web store orders. To help you compare these figures, I recommend shading the values of web store orders blue; then sort the data by member names. You will be able to see how much a member spends at the web store in relation to how much they spend on their subscription. What trends can I identify? When you generate breakdowns by Producers, Locations, or Items, you will be able to identify other interesting trends. For example, perhaps you would like to understand which share generates the most revenue each month. Generate the Past Deliveries ($) report, breakdown by Items. Open the CSV file in a spreadsheet program, such as Microsoft Excel. Delete the item rows that are not relevant, select the data, and insert a column or bar graph. This will provide a clear visual of where you are earning the most revenue. 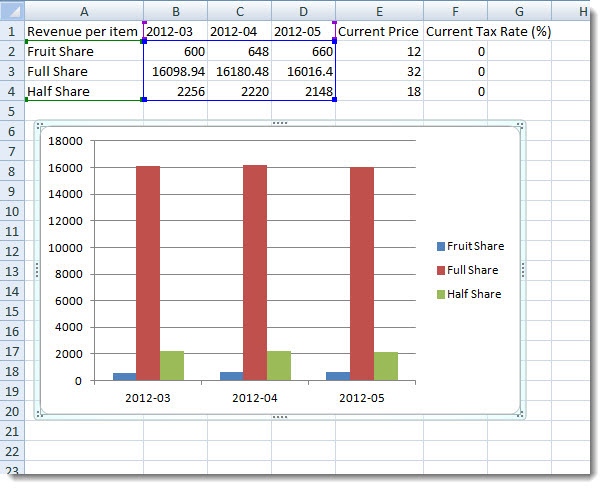 For a snapshot of current trends related to your CSA, check out the Analytics listed under the Status menu in your Dashboard. 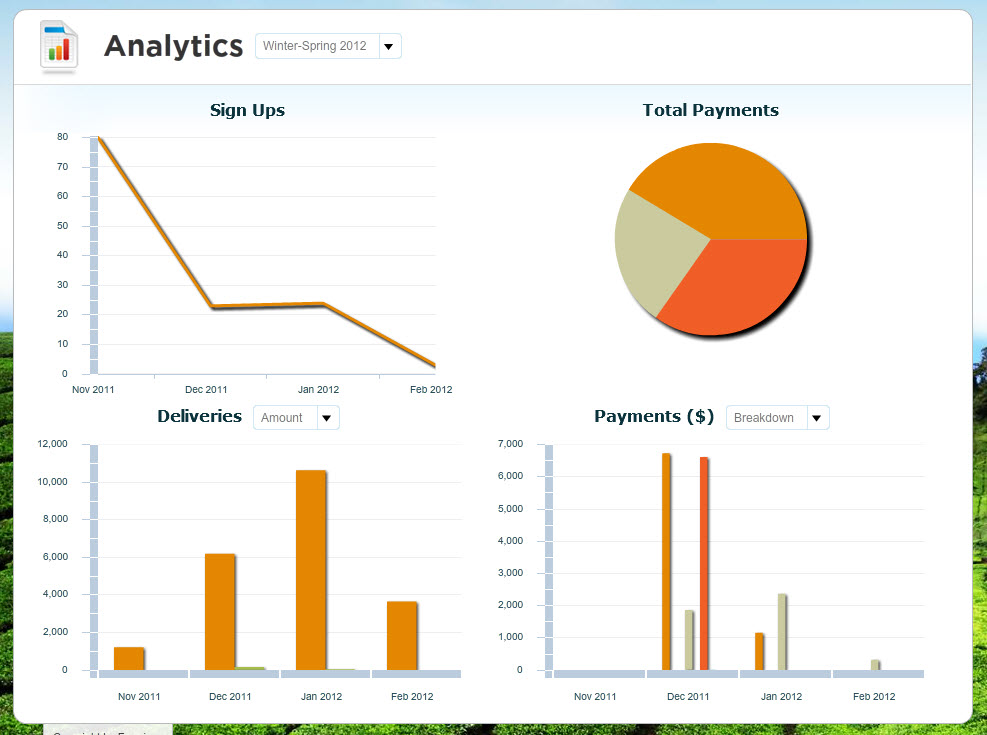 What are some interesting trends that you have discovered?
As Farmigo has grown, so has the Reports module in the Farmigo Dashboard. Based on your feedback, we’ve added many new reports and new ways of formatting and generating each report. After all our additions and improvements, we felt it was time to spruce it up and organize the presentation of the reports in a manner that will help you to easily identify which one you need. Each report will now be assigned a category to indicate when it may be used. The report names have also been updated to better indicate what type of data they contain. I’ve outlined below what each of the new categories contain and the new names of each of the reports. We’ve also improved certain reports - Read on to learn about the new Sourcing Breakdown report. For more information, please visit our help site. Logistics Reports These reports will help you to execute your deliveries. The Overview reports category provides additional reports that will help you plan for your deliveries. 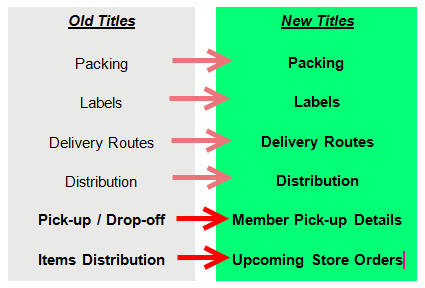 Accounting Reports These reports will help you to track financial data for your members and deliveries.  Overview Reports These reports provide you a broader picture of how you are operating. They will also help you to review past deliveries and plan for future deliveries. 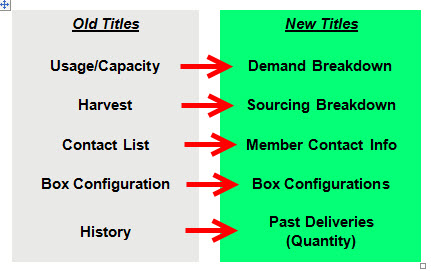 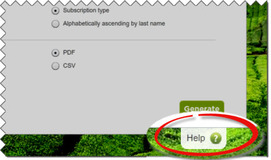 To learn more about each report, click on the Help tab sticking out in the lower right-hand corner for each report in the Dasboard or click here to visit our Help Site. The New Sourcing Breakdown ReportSome of you may already be very familiar with the Box Builder feature in the Dashboard. This features helps you to plan what goes into each of your shares and provides you with a total amount that you need to harvest or order. Previously, the Harvest report would give you summary of these totals over a period of one day or more. The Harvest report will now be called the Sourcing Breakdown report and it will include even more information. All-in-One!The new report not only includes the total number of items that you need to source in order to fill your boxes, it will add web store orders to the total for that period of deliveries. Here is an example of the report as a PDF output. 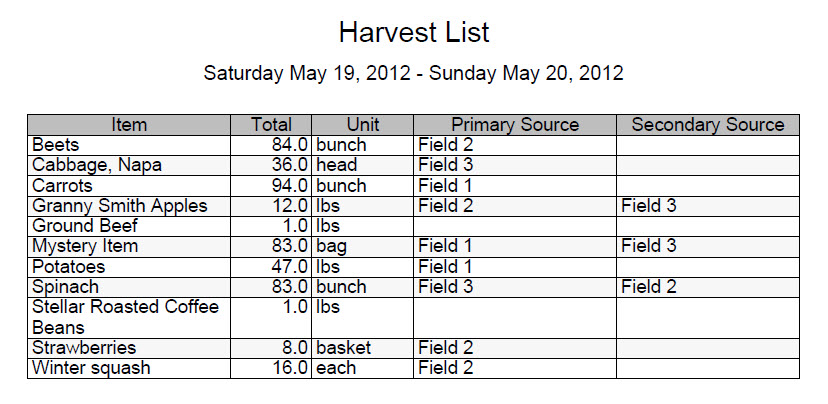 Where to get it...If you use the Harvest Module to note a Primary Source and a Secondary Source for your box items, that information will continue to be included in this report. Now if you generate the CSV output, you may also see who the producer is for an item for those of you who source particular items from different producers, such as eggs, bread or jams.  To learn more about the Sourcing Breakdown report, please visit the Help Site or click on the Help button in the lower right-hand corner of the Reports module.
Many CSA's have numerous pick up locations. Although we all want, and sometimes need to be in two places at once, it just isn't possible. Site hosts are members who help you distribute shares when you can't make it to all of your pick up locations. Assigning a member as a site host gives them access to the tools and resources they need to be prepared to help distribute shares. Today's TOW teaches you how to assign a member to be a host and the tools that will become available to them. How to Assign Hosts to a Pick Up Location To assign a current member as a host of a location, go to the routes module and click on the location you wish to add a host to. Click on the host tab of the edit location card. Then, begin typing the member's name in the "Find Member" field. To select the member hit enter/return. If you wish to allow subscribed members to view the site host's contact info at this location, under "Publish Host," click on the field where it says "No" and select "Yes" from the drop down menu. 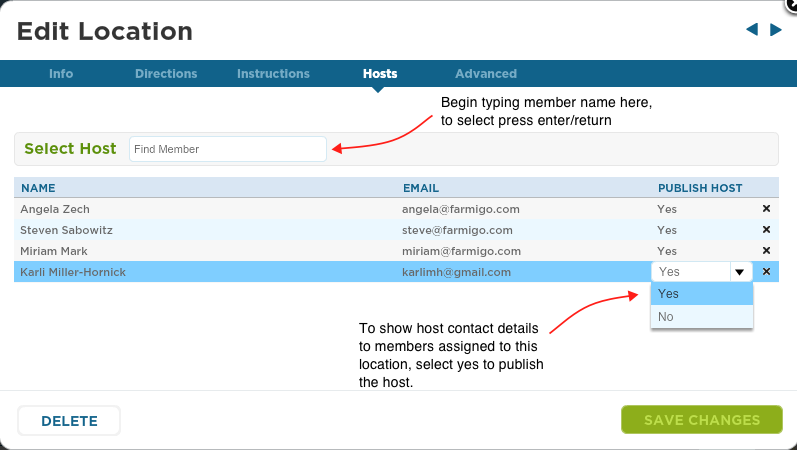 What published hosts will look like in a member's account: If you decide to publish hosts, members assigned to this location will now be able to view the site host contact information when they enter their account. Now, if they are going to be late for a pick up they can directly call the person in charge of the site. 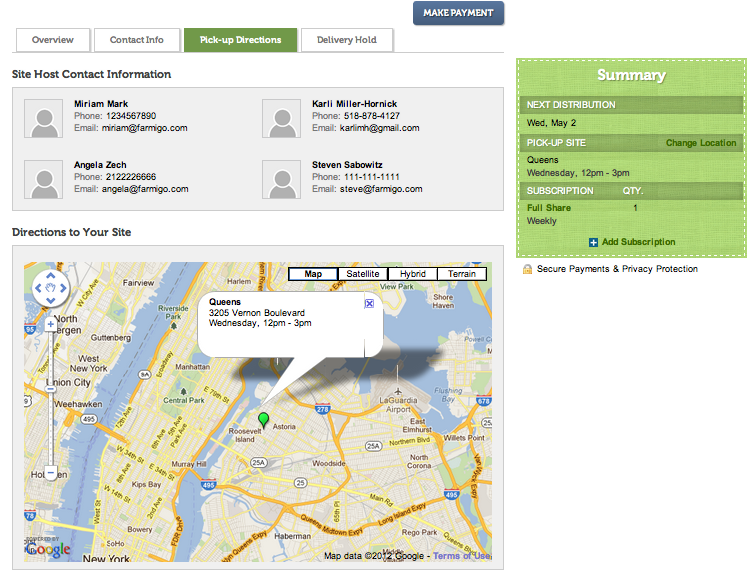 Helpful Tools for Hosts: Hosts will be granted access to two tools that will help them ensure proper share distribution at their pick up site. When a host logs into their account, they will now be able to view the reports tab. They can now view an easily printable PDF version of the Pick-up/Drop off Report and the Contact List Report. * If you would like to publish site host information, but not give them access to these reports, please let us know at [email protected] and we can remove site host access to reports. 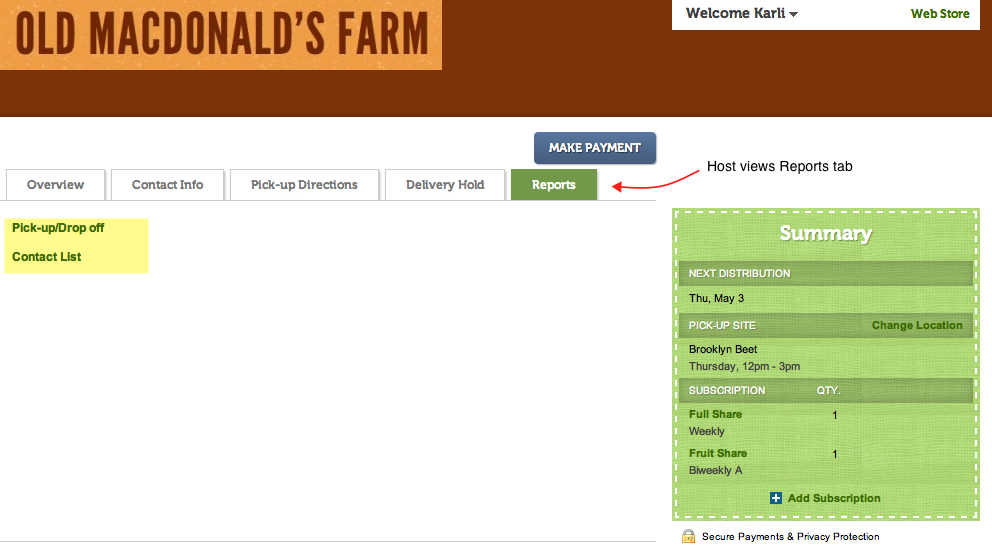 Pick-up/Drop off Report The Pick-up/Drop off Report is formatted as a check list that displays the member name and what they ordered. This report is great for worksites where shares are dropped off in a lunch room/office and members pick up their shares without supervision. Now, members can check off to confirm that they have received their shares so there is no confusion. 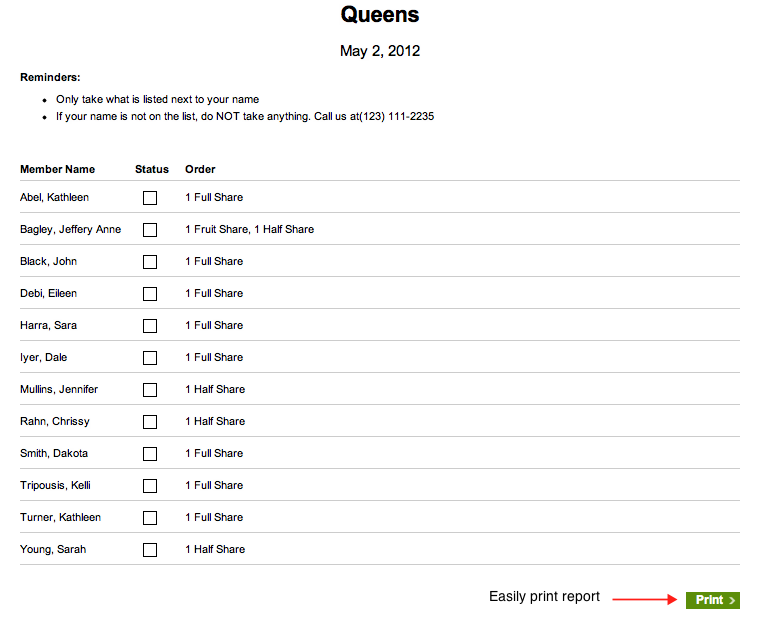 Contact List Report The Contact List Report shows contact info for each member, including phone number and email. If the member has provided secondary contact information, it will be displayed as well. 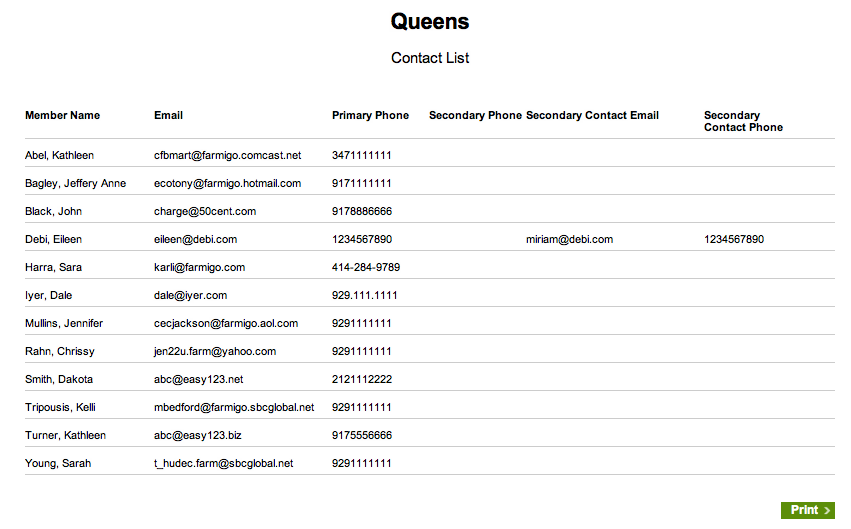 Empower your members to become site hosts by providing them with these helpful tools! Members can be assigned to multiple pick up locations. Also, there is no limit to the number of hosts at a single pick up location. Some CSA's require members to volunteer at least once a season to help with distribution. This is a good way to encourage members to meet each other and contribute to the success of your program. If you could use a helpful hand at your pick-up locations, ask members to become site hosts! How have site hosts helped you? What do you find are the benefits of assigning site hosts? Share your comments below. |