| When reviewing your list of Subscriptions in the dashboard, you may see a symbol appear next to a member’s name that looks like an orange triangle with an exclamation mark in the middle (see image at left). This is the Payment Issue symbol and it may appear for one of 2 reasons:
|
Read on to learn more about how to address each of these payment issues.
Rejected Payments
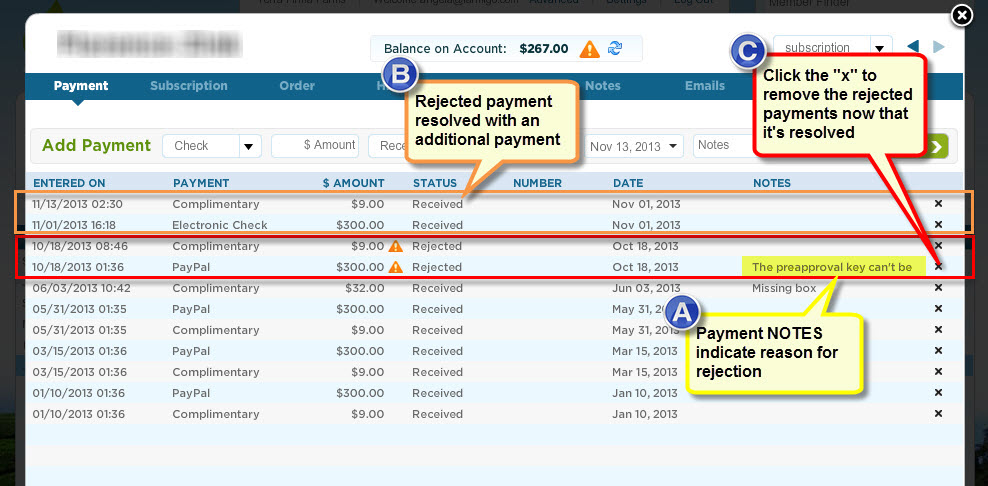
When a credit/debit card, electronic check, or PayPal payment is rejected, the status of the payment noted in the member’s file is changed to “Rejected” and the Payment Issue symbol will appear next to that payment and on the member’s account.
A. You may look under the payment notes for an indication of why the payment was rejected. For more details on how to resolve different types of rejected payments, click here.
B. A rejected payment is resolved once another payment has been made.
C. Once you have resolved the rejected payment, delete the row for the rejected payment listed under the Payment tab of the Member’s file in the dashboard. This will remove that Payment Issue symbol from their account.
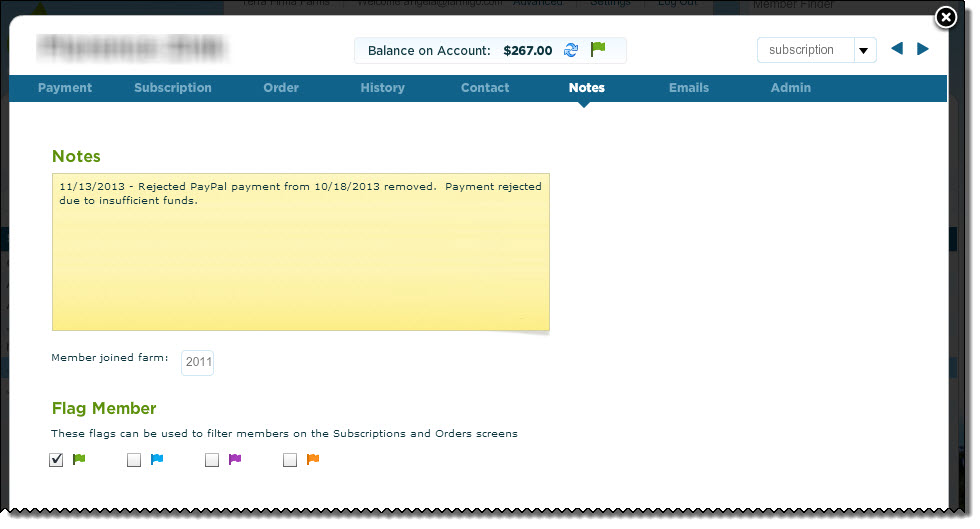
If you would like to track that this member’s payment had been rejected, we recommend adding a note under the Notes tab of the member’s file. You may also track all members that had rejected payments in the past by assigning them the same flag color.
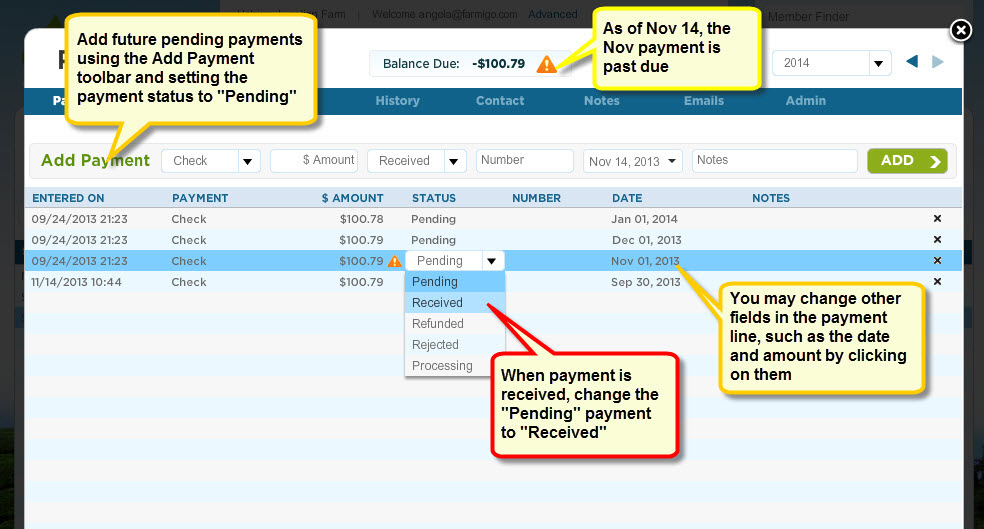
Past Due Payments
When a pending payment is created, it is assigned a due date in the future. If that date has past and the member still hasn’t completed payment, the Payment Issue symbol will appear next to that payment and on the member’s account. This type of payment issue is usually associated with past due check or cash payments.
If the payment was not for the full amount owed, use the Add Payment toolbar to set up another pending payment for the remaining amount owed.
- Once you have received the past due payment from the member:
- Open the member’s file from the dashboard and go to the Payment tab
- Click on the word “Pending” next to the payment issue symbol; a drop-down menu will appear
- Select “Received” from the drop-down menu
- Click on the date field for the same payment line in order to change it to the date that you received payment
- If the payment was not for the full amount, click on the amount field in the same payment line to edit the amount of the payment
- Save changes
If the payment was not for the full amount owed, use the Add Payment toolbar to set up another pending payment for the remaining amount owed.