The charge and manage buttons appear on subscribed members cards in the subscription module. Today's tip is a quick review on what these buttons do. These buttons are used to make one-time charges and manage information related to a member's bank account (ACH) or credit/debit card information through authroize.net. Neither the charge button nor the manage button can be used to edit a member's paypal information.
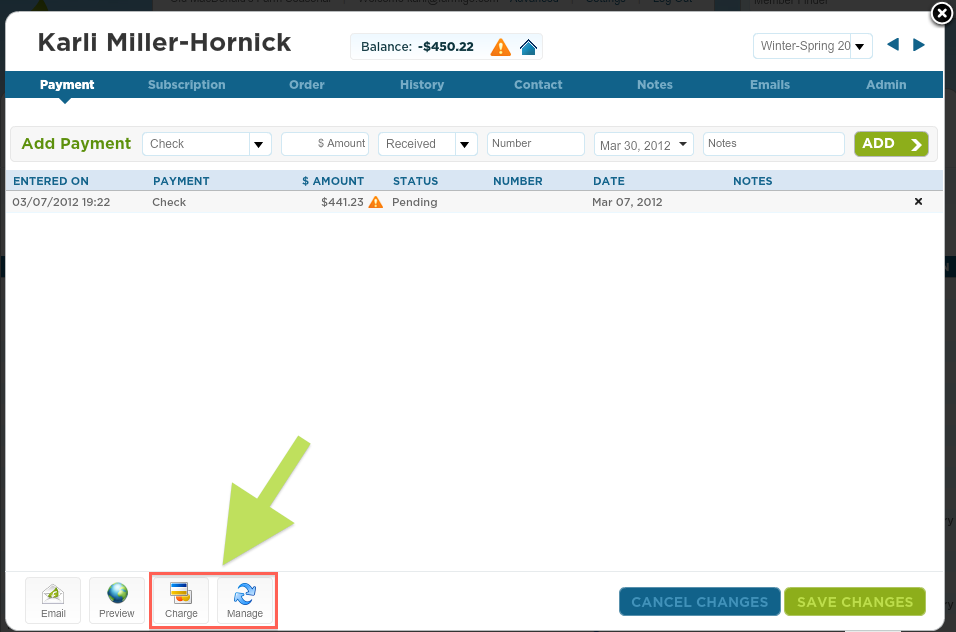
Never noticed these buttons? Below is a screenshot of where they will appear on a member card.
Never noticed these buttons? Below is a screenshot of where they will appear on a member card.
Charge Button
The charge button is only available if you have set up your system to allow members to add payments via e-check or credit card. The charge button is used to make a one time charge to a member who is set up with e-check or credit card payment. When the admin uses the charge button, it will actually charge the member's account and will add a record to the payment tab of the member's card.
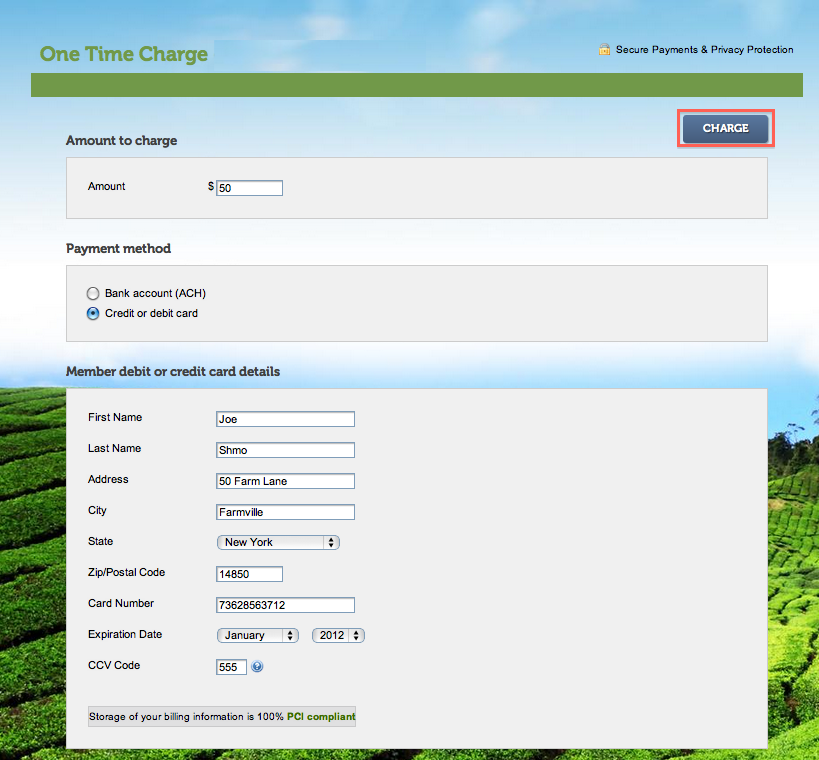
To use the charge button, enter the amount you would like to charge the member. Then select payment method. Depending on which method you choose, you will be prompted to enter payment details. Once all the information is entered, press the Charge button.
We don't find that this button is used very frequently, but sometimes a payment fails or the CSA manager makes a sales agreement with a member outside of the system and needs to charge the member. If a payment fails, you have two options. The member can login to their account and make the payment on their own or you can charge the member through the dashboard. To charge the member, enter the amount of the payment, select the payment method, fill in the payment method details and press charge.
The charge button is only available if you have set up your system to allow members to add payments via e-check or credit card. The charge button is used to make a one time charge to a member who is set up with e-check or credit card payment. When the admin uses the charge button, it will actually charge the member's account and will add a record to the payment tab of the member's card.
To use the charge button, enter the amount you would like to charge the member. Then select payment method. Depending on which method you choose, you will be prompted to enter payment details. Once all the information is entered, press the Charge button.
We don't find that this button is used very frequently, but sometimes a payment fails or the CSA manager makes a sales agreement with a member outside of the system and needs to charge the member. If a payment fails, you have two options. The member can login to their account and make the payment on their own or you can charge the member through the dashboard. To charge the member, enter the amount of the payment, select the payment method, fill in the payment method details and press charge.
Manage Button
The manage is where you can edit a member's payment method information in a secure environment. If a member contacts you to change their bank account or credit card info, go into their member card and press the manage button. Then, select the payment method. A window will open that allows you to edit their payment information.
The manage button is usually used in two situations.
1. The member is already set up on a recurring charge (i.e. prepay, installments) and wants or needs to change their payment information because their credit card expired, they changed their bank account, etc.
2. The member is not set up on a recurring charge, but they would like to be. The member can either login to their account and set this up via the make payment page or the admin can set it up for the member. This would be used mostly by a year-round farm.
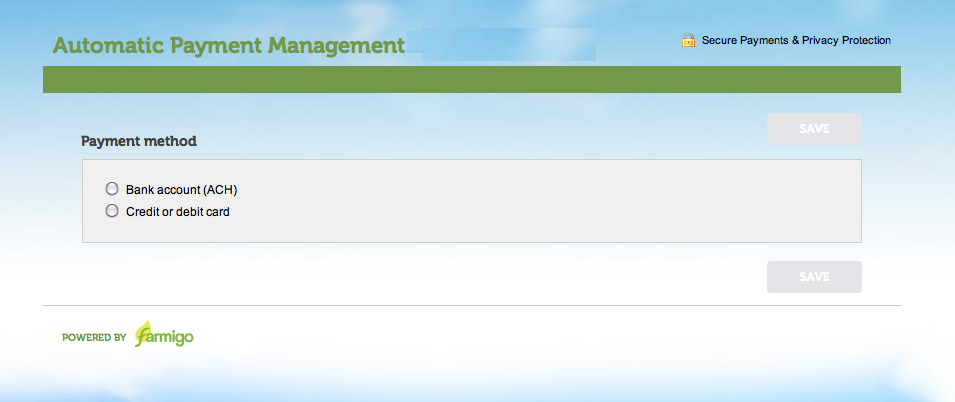
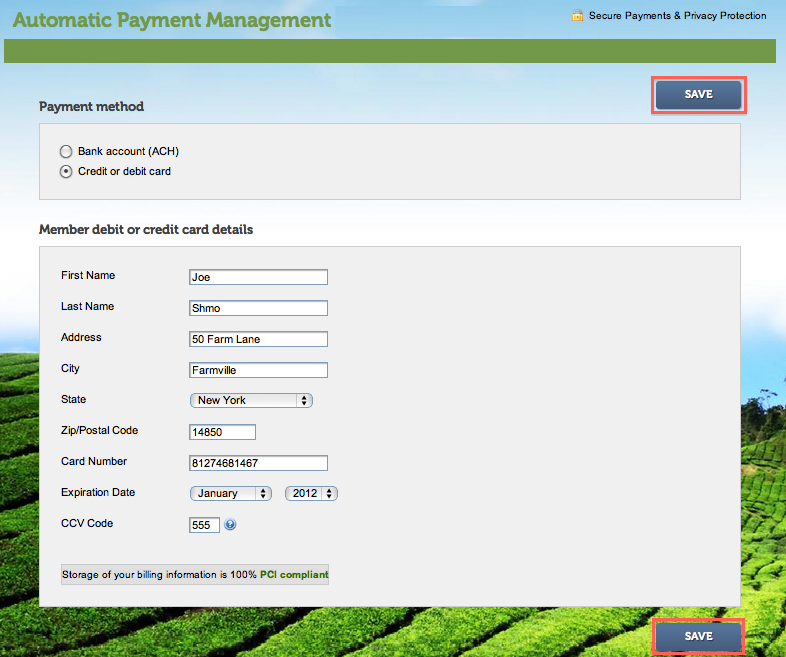
When you click the manage button, a window will pop up giving you the option to edit either the Bank Account (ACH) information or the Credit or debit card information. Once all required information is entered, the Save button will become turn dark blue, indicating that it is clickable.
Select payment method to edit:
The manage is where you can edit a member's payment method information in a secure environment. If a member contacts you to change their bank account or credit card info, go into their member card and press the manage button. Then, select the payment method. A window will open that allows you to edit their payment information.
The manage button is usually used in two situations.
1. The member is already set up on a recurring charge (i.e. prepay, installments) and wants or needs to change their payment information because their credit card expired, they changed their bank account, etc.
2. The member is not set up on a recurring charge, but they would like to be. The member can either login to their account and set this up via the make payment page or the admin can set it up for the member. This would be used mostly by a year-round farm.
When you click the manage button, a window will pop up giving you the option to edit either the Bank Account (ACH) information or the Credit or debit card information. Once all required information is entered, the Save button will become turn dark blue, indicating that it is clickable.
Select payment method to edit:
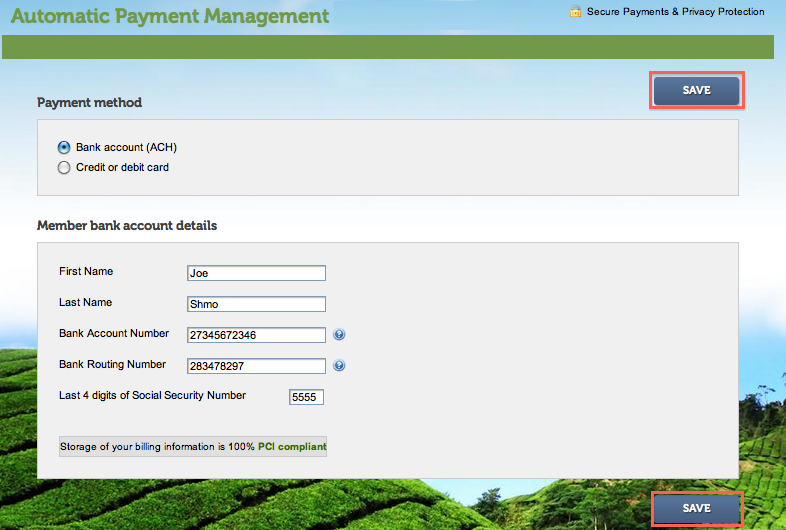
Bank account (ACH)
Required fields include: First Name, Last Name, Bank Account Number, Routing Number, and the Last 4 digits of Social Security Number.
Required fields include: First Name, Last Name, Bank Account Number, Routing Number, and the Last 4 digits of Social Security Number.
Credit or debit card
Required fields include: First Name, Last Name, Address, City, State, Zip Code, Card Number, Expiration Date, and CCV Code.
Required fields include: First Name, Last Name, Address, City, State, Zip Code, Card Number, Expiration Date, and CCV Code.
To sum it up, the charge button is where you go to make a one-time charge on a member's account via e-check or credit card and the manage button is where you can edit the information attached to these accounts. I hope this clears up some of the mystery behind these two buttons. I know you are all busy in the fields this week. I wish you good weather and be safe!