| When reviewing your list of Subscriptions in the dashboard, you may see a symbol appear next to a member’s name that looks like an orange triangle with an exclamation mark in the middle (see image at left). This is the Payment Issue symbol and it may appear for one of 2 reasons:
|
Read on to learn more about how to address each of these payment issues.
We want to give you the in's and out's, tips and tricks for figuring out answers to member questions. We are going to give you a few steps that we always take in order to get some insight on a member's accounts.
Read on to learn more.  As the leaves start to change, we begin looking towards the new year. This week’s tip reviews how to review and add dates to your delivery schedules. This is especially important for ongoing programs that make deliveries year-round; you will want to regularly add dates to your schedules on an ongoing basis. If you manage a seasonal program, you may want to click here to learn about setting up a new season.
Read on to learn more. When a member signs up to your program, they create a Farmigo account at the same time. A member’s Farmigo account and password may be used universally with all Farmigo systems.
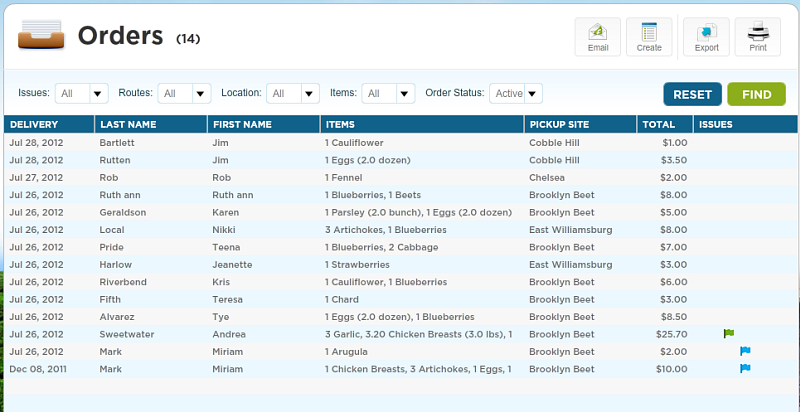
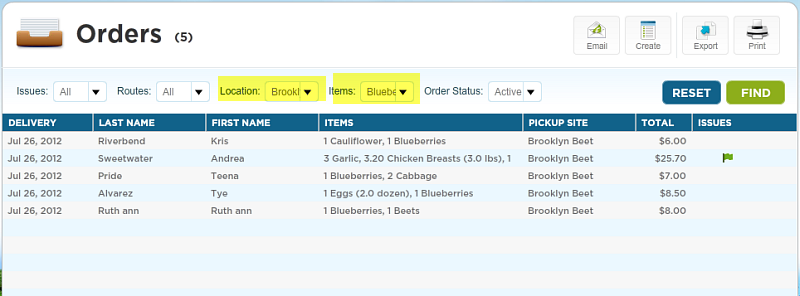
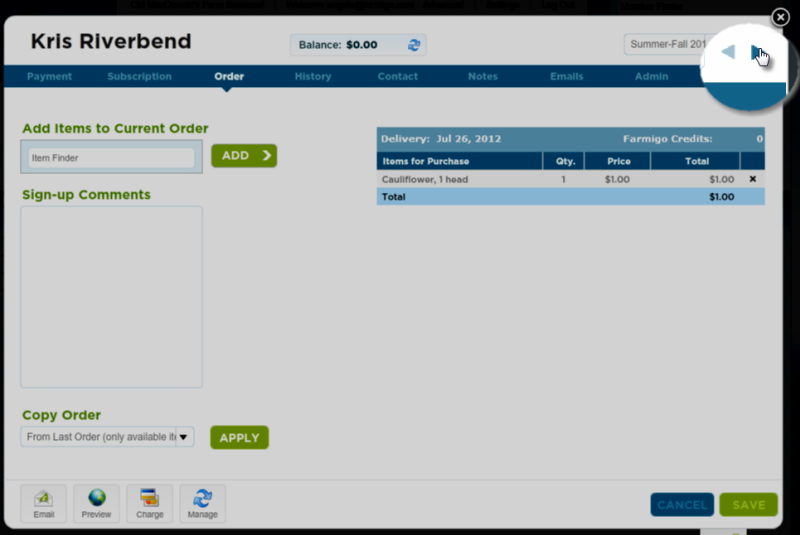
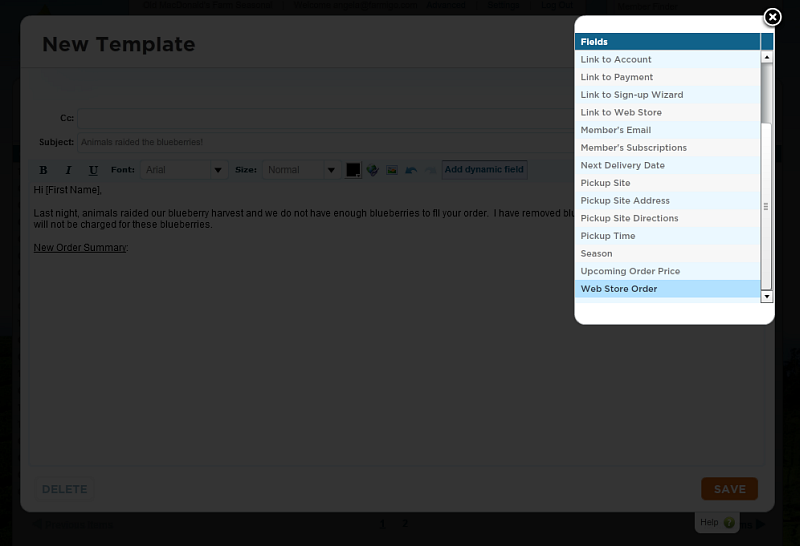
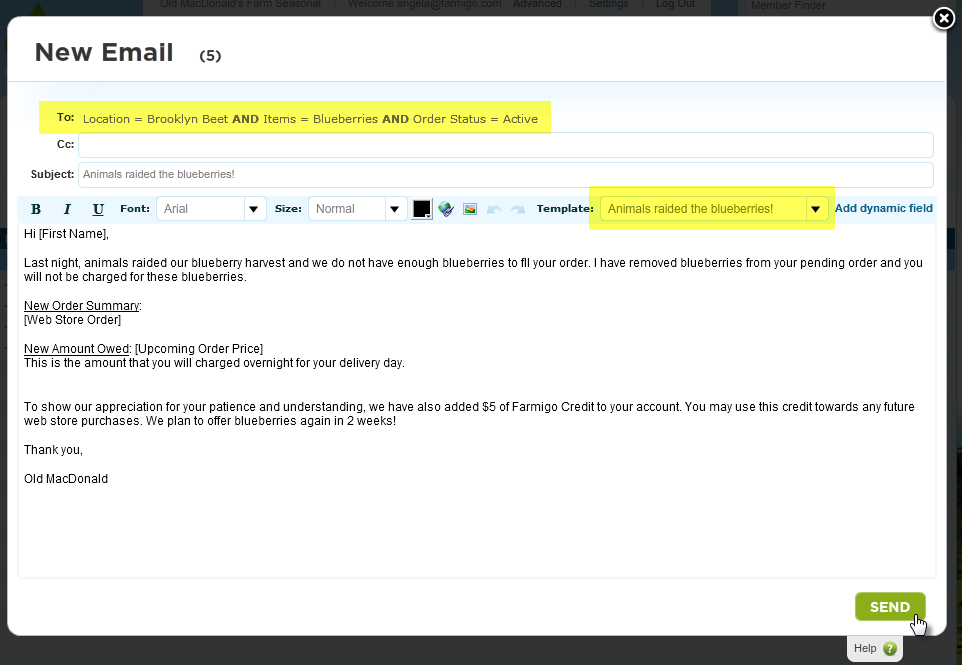
On Wednesday, the Farmigo software development team released a system update that streamlines the process for a member to reset their password in case they forgot it. This new process is outlined below. Farmigo has designed the system dashboard to put as much functionality in your hands as possible. We want you to be completely comfortable in your system management so we’ve worked hard to build a help site that outlines all the features of your system. Each section of your dashboard has a context-sensitive help button at the bottom right, which when clicked, will bring you directly to the help page on that topic. That being said, there are certain features that require the Support Team’s involvement. We've outlined these features below to help you quickly identify those times that it is best to email [email protected] for help. Setting up Your Next SeasonUh oh! Johny didn’t secure the blueberry harvest last night. In the morning you discover that the animals have raided several boxes. Now you only have enough blueberries harvested to meet the demands of a only few pick-up locations. You will not be able to deliver blueberries to members who pick up at Brooklyn Beet ... Farmigo is here to help you manage this crisis! Today’s tip focuses on how the filters featured in multiple parts of the Dashboard can help you to quickly pull together the information that you need and take action. Perform Repeated Actions Faster In unique circumstances, you may need to make changes to the accounts for a large group of members. Filters help you to quickly identify and display the relevant group of members that you need to adjust. For example, you’ve decided that you will remove blueberries from the orders of members who are picking up at Brooklyn Beet. First you go to the Orders module (found under the Members menu). Then you set to Location filter to “Brooklyn Beet” and Items filter to “Blueberries”. This will narrow the group of members with orders from 14 to 5. Before filter After filterNow you may click on the first member in this filtered list and look under the Order tab of her member card. You remove blueberries from her order and save changes. Then, looking in the upper right-hand corner of the member’s card, you see 2 back-to-back blue arrows. When you click on the one on the right, you flip immediately to the Order tab of the next member so that you may quickly make the same adjustment. You then go to the Payment tab of the first member in the filtered list and $5 of Farmigo Credit. Again, you use the 2 back-to-back blue arrows to quickly flip through the Payment tab for all members in the filtered list. Target Group Emails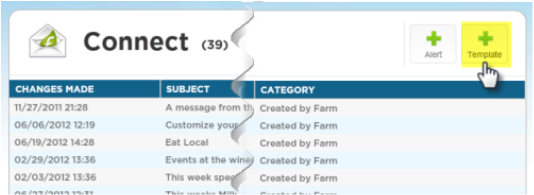 When you would like to send the same message to a specific segment of your membership, you may use filters to identify the segment and then use the Email button found in the upper right-hand corner of the Accounts, Subscriptions, Orders, or Waitlist modules of your Dashboard. To create a more personalized message, you may start by creating a template in the Connect module and inserting dynamic field in your message. To respond to the “Blueberry Situation”, for example, you can go to the Connect module (found under the Market menu) and click the green plus sign in the upper right-hand corner to create a new template. Then you may add dynamic fields, such as [First Name], to personalize the message. Return to the Orders module (found under the Members menu) and set the Location filter to “Brooklyn Beet” and the Items filter to “Blueberries”. Then click on the Email button in the upper right corner of the Orders module. The “To:” field will indicate which segment of your membership will receive the message. Then you may select the template that you just created and click SEND.
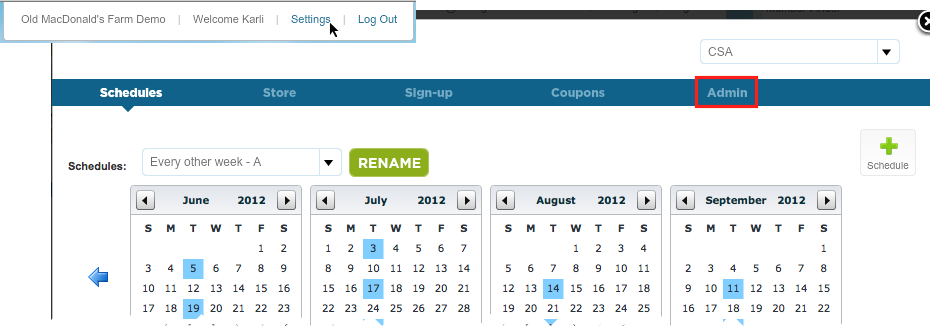
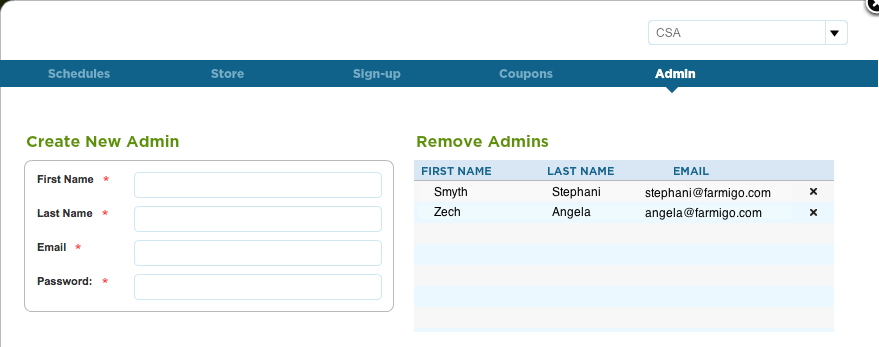
This week we released a new feature that allows you to add and remove your own administrators to your dashboard! To find this brand new feature, click on settings at the very top of your dashboard. This is the same place where you currently manage your schedules. When you open settings, you will see a new tab in the dark blue bar across the top called Admin. The New Admin InterfaceHow to add and remove admins:
To add a new admin, fill in their First Name, Last Name, Email, and Password. ***The password must be more than 6 characters. Press save. Once you add a new admin they will show up on the right side. Now, these people will have access to the dashboard. If you would like these people to be added to the TOW mailing list, please let us know by emailing [email protected]. To remove an admin, click on the x to the right of their information and press save. We hope this improvement adds a bit of simplicity to your life as many of you begin making deliveries for your CSA. |

